The article is not completely SpinTires modding guide. Unfortunately, such guide barely fit our webpage. But you always can find more informations in Spintires community..
Truck creating in SpinTires
Step one:
Download and install the Spintires Editor via Steam service.You can download Spintires Editor only if you already own the game.
First starting Spintires Editor you should see comething like this:
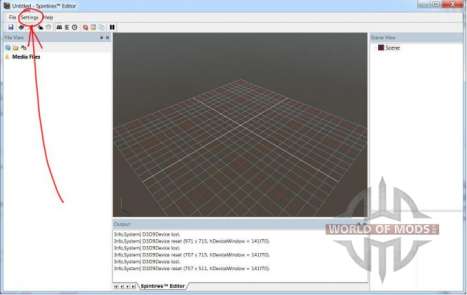
In the poped window follow the algoritm (as you can see on the picture):
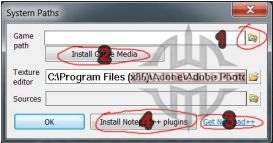
- Choose folder with installed game.
- Press the "Install Game Media" button - it will start to copy game files in Spintires Editor folder, which will allow Editore to use game textures. So if you want to use the Editor - don't unistall the game. After that you will gain access to all game resourses and allowed to use it in your mod. After each update you'll have to repeat this process, to allow Spintires Editor to use updated game files.
- Also it highly recommended to use NotePad++ for XML files editing. If you don't have this programm, then click on the "Get Notepad++" button.
- After NotePad++ has installed, press "Install Notepad++ plugins", to install special plugin for Spintires Editor, then follow the instruction on your screen. This plugins have many useful functions, including:
- open any gamefile more quckly (ALT-SHIFT-O)
- fast move to any XML node (ALT-SHIFT-D)
and much more.
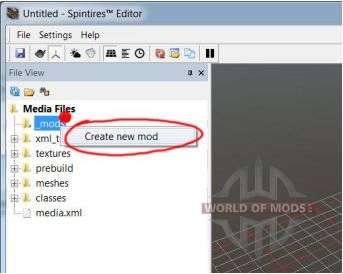
Right-click on "_mods" in the File View window and pick "Create new mod" (as on the picture). It will create a new mod for Steam Workshop. Mod will be invisible for everyone exept you, untill you publish it.
Basic modding concepts:
Spintires is a number of files, placed within the directory, with mod ID name, which is within "_mods" special directory.
Each time you start Spintires Editor, folder of all mods that you have created, will be automatically moved to a directory called "_mods". All you need to do before publishing is to fill out folder files. When you want to publish the mod, these files will be automatically converted in game-understandable format, renaimed and zipped, then upload to Steam Workshop. Thus no one except the author of the mod won't be able to see the original files of the mod.
Step two:
Create truck ".X" mesh file
You don't always will need to create new mesh file for new truck. For example, you may need to edit the textures of the existing truck, but in our example we will create a new truck from scratch.
Spintires uses the format ".x" for mesh file that is an old format DirectX.
Therefore, you will need a Converter for your models. We used 3Ds Max 2012 and recommend converter is the kW X-port.
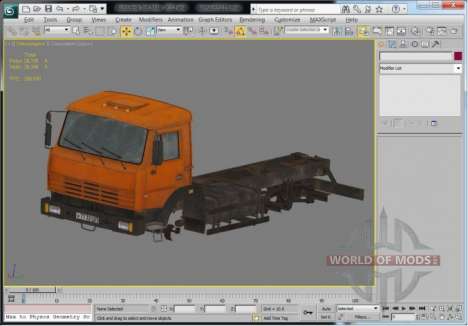
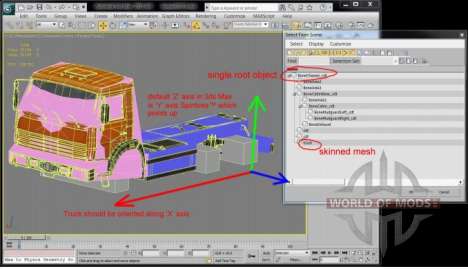
Make sure that the position of the model relative to the axes installed in the standard position. In 3D Max to set the standard value using the Hierarchy tab -> Reset Pivot.
Make sure the root object and the texture of the truck have the same rotation (X: 0.0, Y:0.0; Z:0.0) In 3D Max you can set with the help of such Utilities tab> Reset XForm modifier.
Truck should be aligned alnog "X" axis.
At least one object (or subobject) of the model must be physical. Physical objects are objects with collision model. Spintires automatically creates the collision model for all objects that have the ending "_cdt" in the title. Thus, these objects (or hitboxes) will not be visible in the game, that is, are transparent, but can have a physical body as such. At the same time, if the object has related subobject called "cdt" - it will use it's geometry as its own collision model. Objects with the name of "cdt" is not available in the game as such.
After the installation of the truck mesh is complete, move ".X" file to "Media\_mods\[mod name]\meshes\trucks"
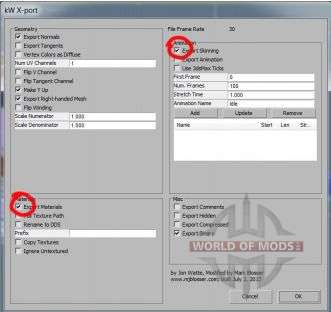
Step three:
Create truck XML mesh file
Each ".X" file in the Spintires has a pair .XML mesh file that describes the texture and specific properties of the polygonal model in the game.
Find your new ".X" file in the File View and double-click on it.
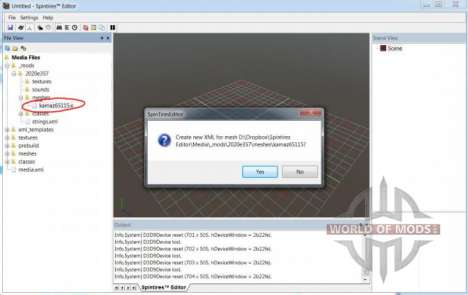
Open your new XML file in Spintires Editor. Just right click the model window and select "Open XML File" in the context menu.
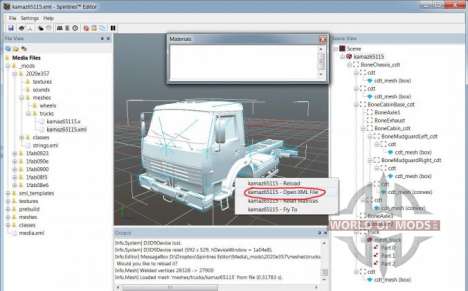
We highly recommend you to use NotePad++ for editing XML files. If you followed our advice and installed all the necessary plugins for NotePad++, then simply press the "Open XML File" and it will automatically open NotePad++.

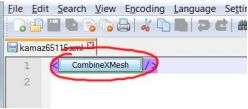
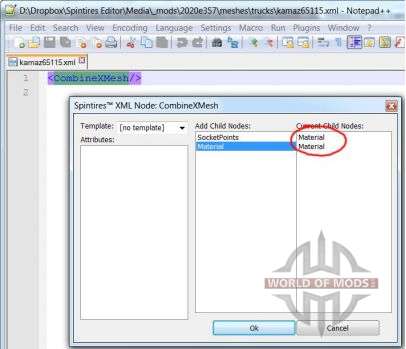
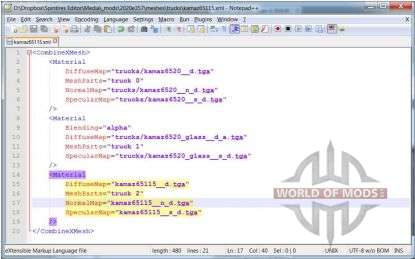
After a sub-node with materials added, double-click it to add appropriate attributes.
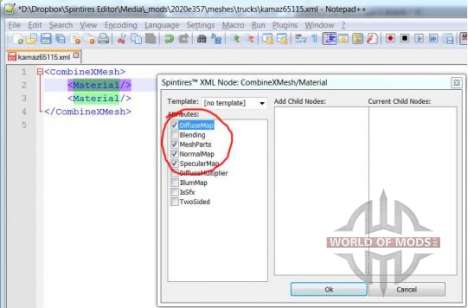
Once you have added DiffuseMap and other attributes, move the cursor to the parameters of the attribute (between quotes). You should receive the dialog window of configure attributes.
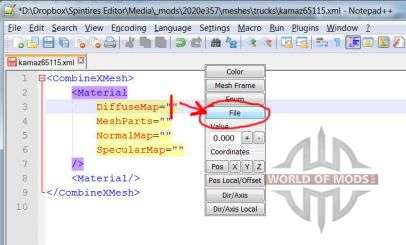
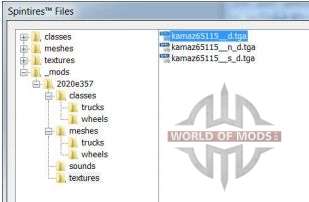
Select the texture file using the SpinTires Editor file browser.
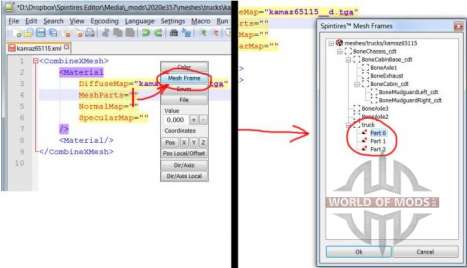
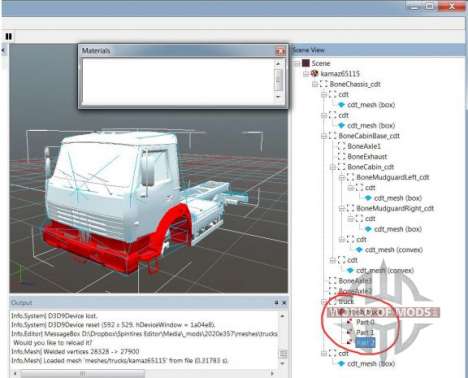
In the end your XML-mesh file should look like that:
Step four:
Create truck file.
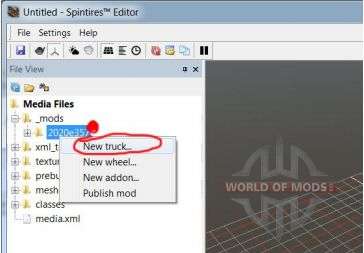
Right-click on the folder that we created at the very beginning and select "New truck" in the context menu.
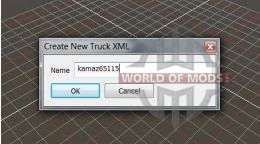
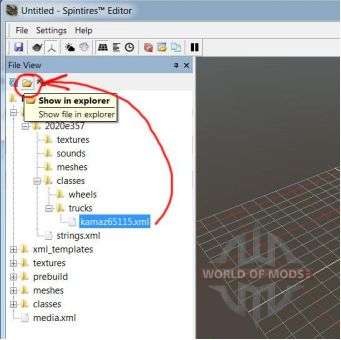
Once you have selected a name, a new XML file should be created in [name of mod]\classes\trucks.
Pick the file and press "Show in explorer" on the toolbar.
First of all, select truck mesh file as attribute values for "Truck/PhysicsModel/Mesh". Use Spintires tools to select the file, instead of "[truck mesh]" you should have something like "trucks/kamaz65115".
Next, select the wheel type (some standard types of wheels are in the folder "Media/classes/wheels") and replace "[rear wheel class]" and "[front wheel class]". Please note that these files are XML classes, not meshes.
After that, make sure that "ParentFrame" attributes is directed to correct mesh files (subobjects).
When these manipulations are finished, you can open truck XML file in Spintires Editor. It should look something like this:
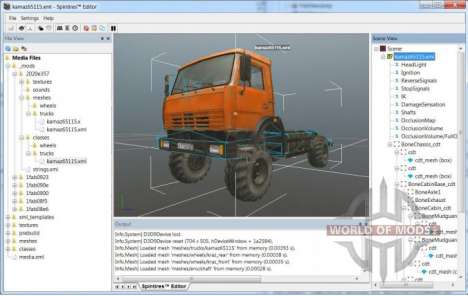
Step five:
Truck customizing.
In fact the process of creating a truck is to edit the text of truck XML file. Here you can see a few tools that should help you with this.

1. Wireframe mesh view.
2. Disable edit. Quite useful when you only want to view files and textures of the model, but don't want to edit them.
3. Lighting mode: direct and ambient light model. Useful for verifying textures and occlusion volumes.
4. Fog on/off. Not used in truck mods creating.
5. On/off scene grid.
6. System statistics.
7. System timers.
8. Reload resourses (meshes and textures).
9. Open media-file.
10. Copy the object. Not used directly in truck mod creating.
11. Start/stop physic simulation. Helpful for test truck physics in Spintires Editor.
You can also use the Havok Visual Debugger to test your physics settings. To do so, open truck XML file in Spintires Editor and start the simulation (button 11 on the toolbar).
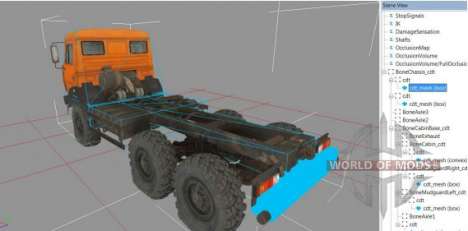
Then run Havok Visual Debugger (hkVisualDebugger.exe) and connect it to Spintires Editor (if this does not happen automatically, use the Network > Connect > localhost). After this you can use View > User Cameras > Spintires Camera to align Visual Debugger camera Spintires Editor camera.
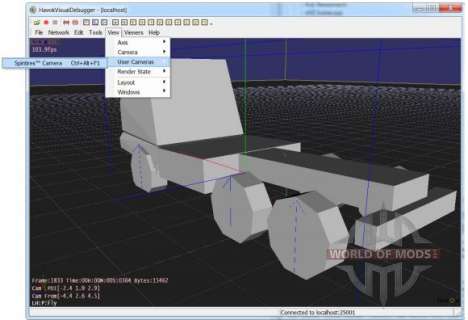
Spintires Editor is essentially a truck viewer.
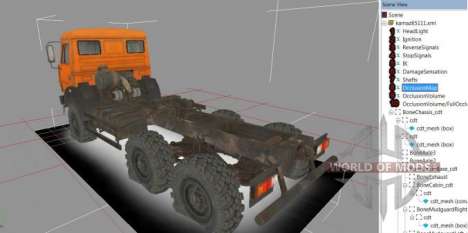
5 (IK) - view IK settings for TruckAddon/ControlledIK and TruckAddon/AutomaticIK.
6 (DamageSensation) - shows area and truck parts the game is tested against. Also use to test water overflows.
7 (Shafts) - truck drive shafts positions.
8 (OcclusionMap) - the texture placed under the truck to show light occlusion.
9 (OcclusionVolume) - an area of the truck that truck self-occludes.
10 (OcclusionVolume/FullOcclusion) - used instead of OcclusionVolume of the addon with "IsChassisFullOcclusion" attribute set to "true" is installed.
Spintires Editor working in pair with Notepad++ Spintires plugins:
First example: adjust of drive shafts.
- Open the truck XML file ti which you want to add drive shafts (usr ALT-SHIFT-O).
- Select "Open XML File" in context menu.
- Add "SocketPoints/SocketPoint" node in Notepad++ if there's none, then place the cursor between commas of "Pos" attribute values and press "Pos" button.

- Spintires Editor window should pop up and show the global position of selected drive shafts node.
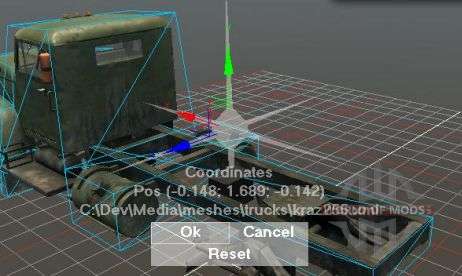
- Use 3D control to change position of drive shafts node or click the meash to snap to point of intersection. Press "OK" to save the coordinates in Notepad++, "Cancel" to cancel changes and "Reset" to retirn to the default settings.
Second exmaple: Adjust OcclusionMap
- Open truck XML-mesh file ti which you want to add drive shafts (usr ALT-SHIFT-O).
- Select "Open XML File" in context menu.
- Add "Truck/OcclusionMap" node in Notepad++ if there's none, then place cursor between commas of "HalfSizeZ" attrubute values and press "Z" key.
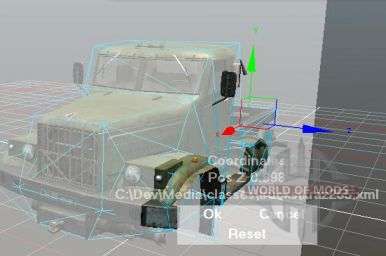
- Use 3D contorl to change width of OcclusionMap.
You can also edit local directions and positions. To do so select the first subobject in Spintires Editor, and then click "Local Pos/Offset" or "Dir/Local Axis" in the dialog window of Notepad++ Spintires plugins.
Step six:
Truck testing in the game.
After testing your truck in Spintires Editor it's highly recommended to test it in the game.
Run Spintires and make sure that Steam is still active.
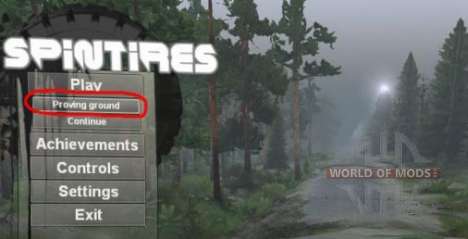
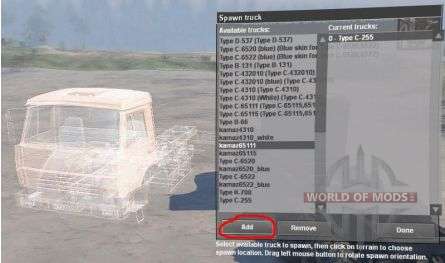
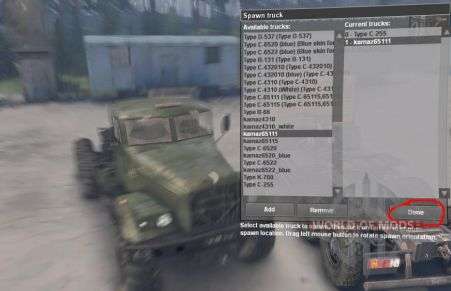
Select "Proving ground" in the main menu to start launch the proving ground map.
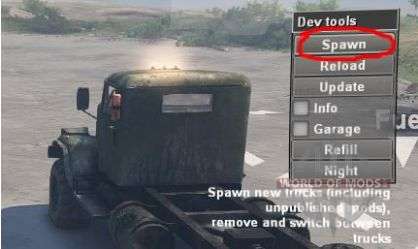
Press "Spawn" button to add new truck.
Step seven:
Mod publishing.
Your truck or addon must have a proper name. Add a node like this:
Replace "kamaz65111" in a special file named "strings.xml" located in the root folder of your mod, with the name of your truck or addon and add this name in the "Value" attribute. Localization of mods is not yet realized, so it is highly recommended to use English in all names.
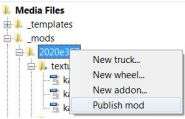
Once you have given a name to all your creations and tested them both in Spintires Editor and in the game, run Spintires Editor and right click on your mod in "File View" and click "Publish mod".
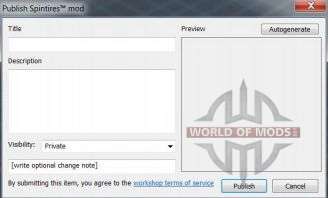
If this is the first time you add a new item to the Steam Workshop, you will have to agree to the terms of service, by means of clicking on the "workshop terms of service" link.
Optionally, add a change note and click "Publish". The download window should appear. Once the download has finished the mod will be visible on the page https://steamcommunity.com/app/263280/workshop/